30 Java Programming Examples
This tutorial is designed with 30 Java Programming examples to help the new Java users to learn the basic Java programming.
Prerequisites:
You have to do the following tasks before practicing the 30 examples of this tutorial:
A. Install JDK
Download the latest version of JDK from the following URL address:
https://www.oracle.com/in/java/technologies/downloads/
B. Install a Java Editor
Many helpful Java editors are available to write and execute the Java codes. The NetBeans editor is used in this tutorial to write and execute the Java code. You can download this editor from the following URL address:
https://netbeans.apache.org/download/index.html
List of Contents:
- Class and Object
- Data Types
- Comments
- Access Modifiers
- Input/Output
- Methods
- Conditional Statement
- Basic Operators
- Logical Operators
- Instanceof Operator
- Loops
- Command-line arguments
- Constructor
- Exception Handling
- Searching with regular expression
- Reading and Writing files
- Date and Time
- Nested Classes
- Inheritance
- Polymorphism
- Encapsulation
- Abstraction
- Interfaces
- Operator Overloading
- Method Overloading
- Method Overriding
- Object Cloning
- Random Number
- Java Package
- Java Swing
Class and Object
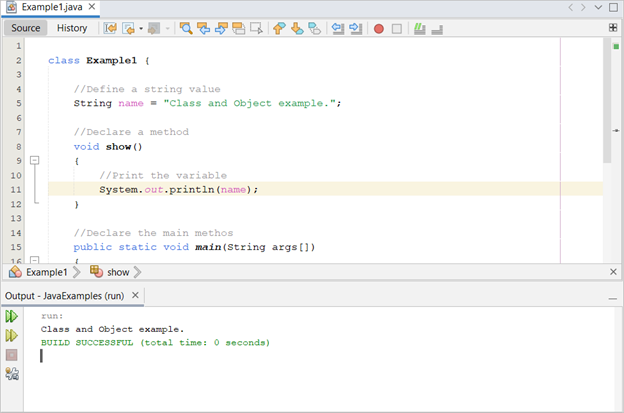
The class and object are the main parts of the object-oriented programming language. A class is a user-defined data type that may contain one or more data members and methods. An object is the instance of the class that is used to access the data members and the methods of the class. A simple class with one data member and a method is defined in the following example. Here, the main() method is used to declare the object of the class to access the data member and the method:
//Define a string value
String name = "Class and Object example.";
//Declare a method
void show()
{
//Print the variable
System.out.println(name);
}
//Declare the main method
public static void main(String args[])
{
//Create an object of the class
Example1 obj = new Example1();
//Call the method
obj.show();
}
}
The following output appears after executing the Java file:
Data Types
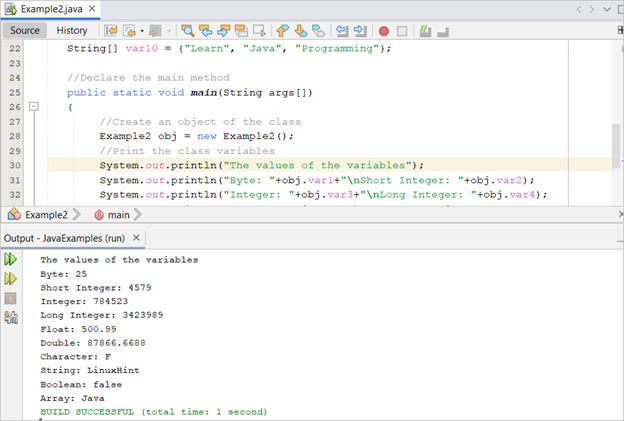
The method of declaring and printing different types of data in Java is shown in the following example. Ten types of data members are defined in the class:
//Define byte variable
byte var1 = 25;
//Define short integer variable
short var2 = 4579;
//Define integer variable
int var3 = 784523;
//Define long integer variable
long var4 = 3423989;
//Define float variable
float var5 = 500.99f;
//Define float variable
double var6 = 87866.6688;
//Define character variable
char var7 = 'F';
//Define string variable
String var8 = "LinuxHint";
//Define boolean variable
boolean var9 = false;
//Define array variable
String[] var10 = {"Learn", "Java", "Programming"};
//Declare the main method
public static void main(String args[])
{
//Create an object of the class
Example2 obj = new Example2();
//Print the class variables
System.out.println("The values of the variables");
System.out.println("Byte: "+obj.var1+"\nShort Integer: "+obj.var2);
System.out.println("Integer: "+obj.var3+"\nLong Integer: "+obj.var4);
System.out.println("Float: "+obj.var5+"\nDouble: "+obj.var6);
System.out.println("Character: "+obj.var7+"\nString: "+obj.var8);
System.out.println("Boolean: "+obj.var9+"\nArray: "+obj.var10[1]);
}
}
The following output appears after executing the Java file:
Comments
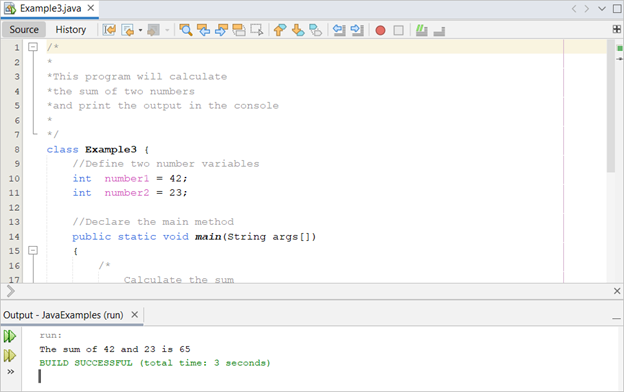
Three types of comments can be used in Java: single-line comment, multi-line comment, and documentation comment. The “//” is used for the single-line comment. The “/*..*/” is used for the multi-line comment. The “/**…*….*…*/” is used for the documentation comments. Three types of comments are shown in the following example:
*
*This program will calculate
*the sum of two numbers
*and print the output in the console
*
*/
class Example3 {
//Define two number variables
int number1 = 42;
int number2 = 23;
//Declare the main method
public static void main(String args[])
{
/*
Calculate the sum
of two integer numbers
*/
Example3 obj = new Example3();
int result = obj.number1 + obj.number2;
//Print the summation value
System.out.println("The sum of "+ obj.number1 + " and "+ obj.number2 + " is " + result);
}
}
The following output appears after executing the Java file:
Access Modifiers
Access modifiers are used to set the scope of the data members and methods of the Java class. Four access modifiers of Java are mentioned in the following:
- Default
When no modifier is defined for the data members and methods of the class, those are not accessible from anywhere. It is called the default modifier. - Public
This modifier is used to access the data members and methods from anywhere. - Private
This modifier is used to make the data members and methods of the class private. Those are accessible inside the own class only. - Protected
This modifier is used to make the data members and methods accessible from the own class and from the inherited class.
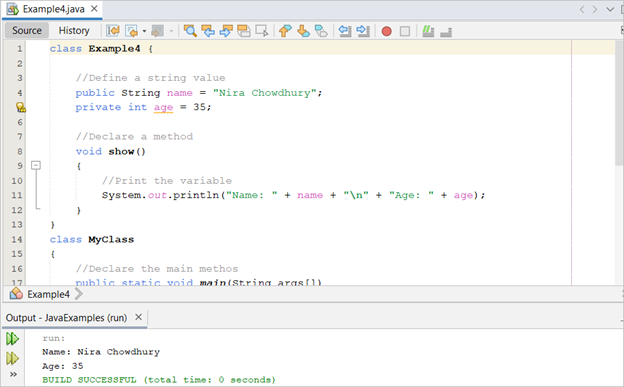
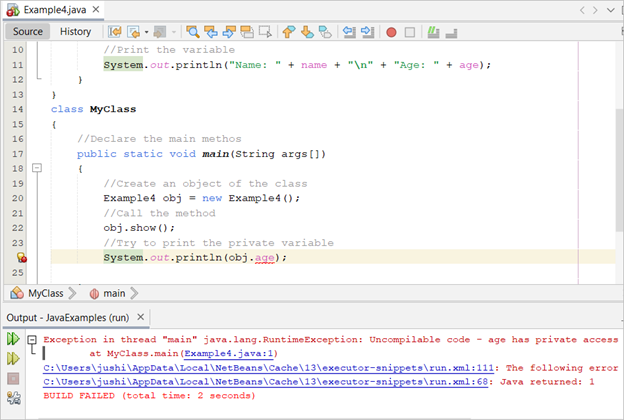
The use of public and private data members are shown in the following example:
//Define a string value
public String name = "Nira Chowdhury";
private int age = 35;
//Declare a method
void show()
{
//Print the variable
System.out.println("Name: " + name + "\n" + "Age: " + age);
}
}
class MyClass
{
//Declare the main method
public static void main(String args[])
{
//Create an object of the class
Example4 obj = new Example4();
//Call the method
obj.show();
//Try to print the private variable
//System.out.println(obj.age);
}
}
The following output appears after executing the Java file. Here, the private data members has been accessed from its class:
The following output appears after executing the Java file. Here, the error occurs when the private data has been tried to access from another class:
Input/Output
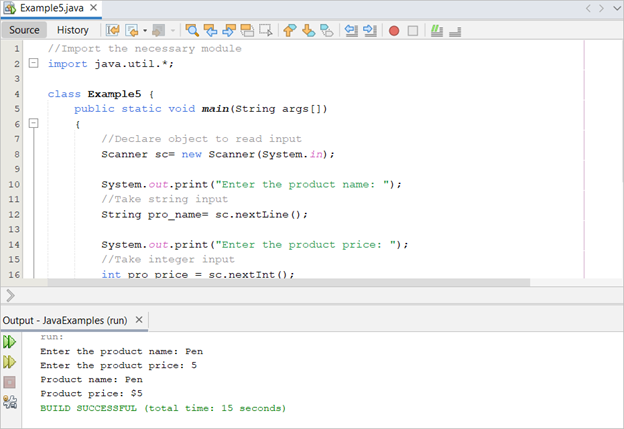
The method of taking different types of input from the user and printing those values is shown in the following example. The Scanner class is used here to take an input from the user. The nextLine() function is used to take the string input and the nextInt() function is used to take the integer input:
import java.util.*;
class Example5 {
public static void main(String args[])
{
//Declare object to read input
Scanner sc= new Scanner(System.in);
System.out.print("Enter the product name: ");
//Take string input
String pro_name= sc.nextLine();
System.out.print("Enter the product price: ");
//Take integer input
int pro_price = sc.nextInt();
//Print the input values
System.out.println("Product name: " + pro_name + "\n" + "Product price: $" + pro_price);
}
}
The following output appears after executing the Java file. Here, “Pen” and 5 are taken as input values:
Methods
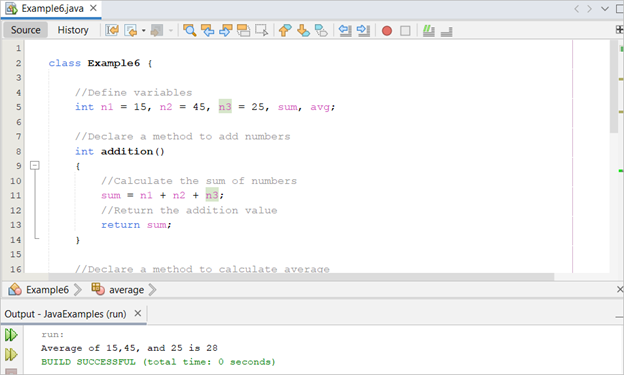
The method of declaring different types of methods is shown in the following example. Here, the addition() method is declared to add three numbers and the average() method is declared to calculate the average of the three numbers. The execution starts from the main() method:
//Define variables
int n1 = 15, n2 = 45, n3 = 25, sum, avg;
//Declare a method to add numbers
int addition()
{
//Calculate the sum of numbers
sum = n1 + n2 + n3;
//Return the addition value
return sum;
}
//Declare a method to calculate the average
void average()
{
//Calculate the average value
avg = addition()/3;
//Print the average value
System.out.println("Average of " + n1 + "," + n2 + "," + " and " + n3 + " is " + avg);
}
//Declare the main method
public static void main(String args[])
{
//Create an object of the class
Example6 obj = new Example6();
//Call the method
obj.average();
}
}
The following output appears after executing the Java file:
Conditional Statement
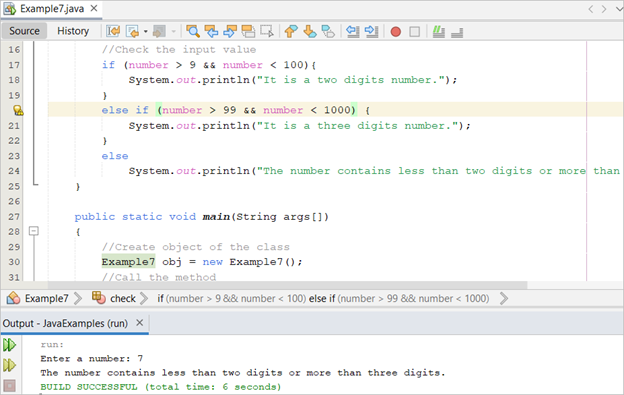
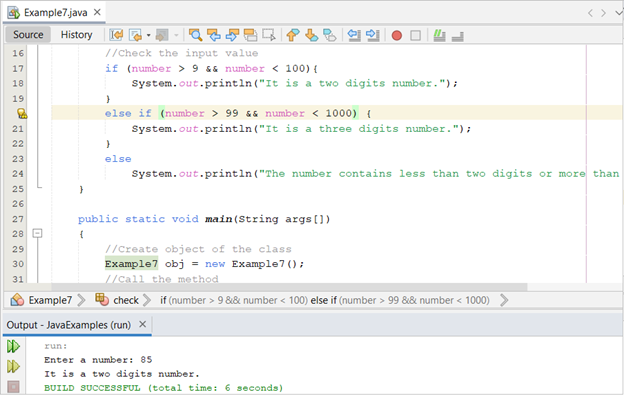
The use of the conditional statement using the “if-else if-else” statement is shown in the following example. After taking a number from the user, the “if-else if-else” statement checks the number of digits of the input value:
import java.util.*;
class Example7 {
//Declare object to read input
Scanner sc= new Scanner(System.in);
//Declare an integer variable
int number;
void check()
{
System.out.print("Enter a number: ");
//Take integer input
number = sc.nextInt();
//Check the input value
if (number > 9 && number < 100){
System.out.println("It is a two digits number.");
}
else if (number > 99 && number < 1000) {
System.out.println("It is a three digits number.");
}
else
System.out.println("The number contains less than two digits or more than three digits.");
}
public static void main(String args[])
{
//Create an object of the class
Example7 obj = new Example7();
//Call the method
obj.check();
}
}
The following output appears after executing the Java file if 7 is taken as the input value:
The following output appears after executing the Java file if 85 is taken as the input value:
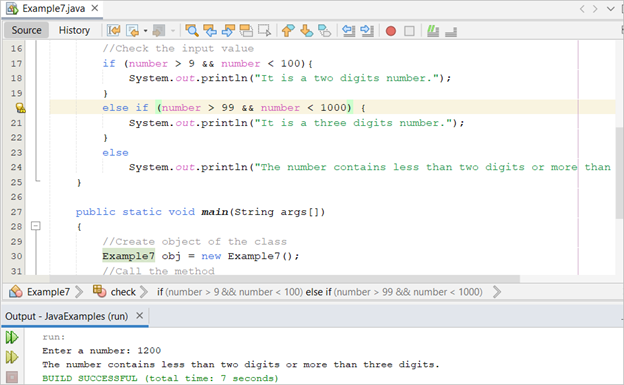
The following output appears after executing the Java file if 1200 is taken as the input value:
Basic Operators
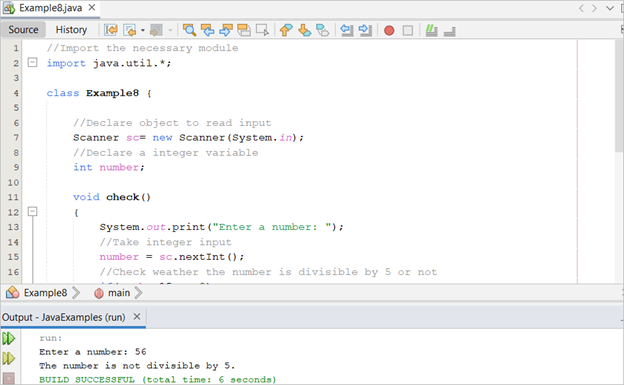
Java has many operators to perform arithmetic operations like other standard programming languages. The use of “%” operator is shown in the following example. The program checks whether the input value is divisible by 5 or not:
import java.util.*;
class Example8 {
//Declare object to read input
Scanner sc= new Scanner(System.in);
//Declare an integer variable
int number;
void check()
{
System.out.print("Enter a number: ");
//Take integer input
number = sc.nextInt();
//Check whether the number is divisible by 5 or not
if(number%5 == 0)
System.out.println("The number is divisible by 5.");
else
System.out.println("The number is not divisible by 5.");
}
public static void main(String args[])
{
//Create an object of the class
Example8 obj = new Example8();
//Call the method
obj.check();
}
}
The following output appears after executing the Java file if 56 is taken as the input value:
The following output appears after executing the Java file if 15 is taken as the input value:

Logical Operators
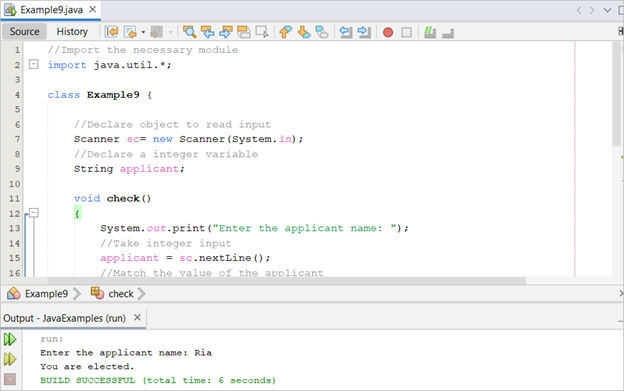
Many types of logical operators can be used in Java to check multiple conditions. The use of logical OR is shown in the following example:
import java.util.*;
class Example9 {
//Declare object to read input
Scanner sc= new Scanner(System.in);
//Declare an integer variable
String applicant;
void check()
{
System.out.print("Enter the applicant name: ");
//Take integer input
applicant = sc.nextLine();
//Match the value of the applicant
if(applicant.equals("Ria") || applicant.equals("Sourav") || applicant.equals("Nirob"))
System.out.println("You are elected.");
else
System.out.println("you are not selected.");
}
public static void main(String args[])
{
//Create object of the class
Example9 obj = new Example9();
//Call the method
obj.check();
}
}
The following output appears after executing the Java file if “Ria” is taken as the input value:
The following output appears after executing the Java file if “Riya” is taken as the input value:

Instanceof Operator
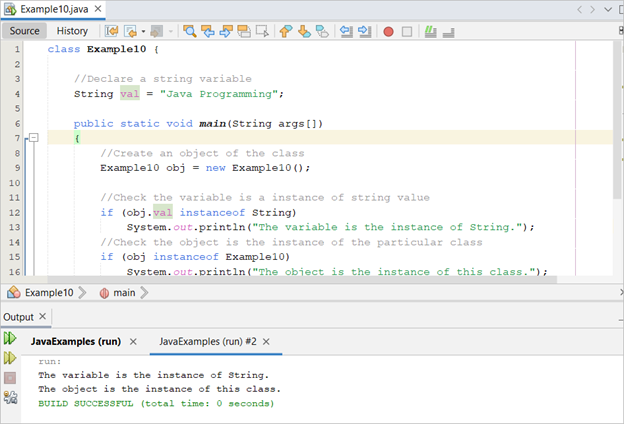
The instanceof operator is used to check the type of the data member or the object instance. The method of checking the type of the data member and checking the object instance is shown in the following example:
//Declare a string variable
String val = "Java Programming";
public static void main(String args[])
{
//Create an object of the class
Example10 obj = new Example10();
//Check the variable is an instance of string value
if (obj.val instanceof String)
System.out.println("The variable is the instance of String.");
//Check the object is the instance of the particular class
if (obj instanceof Example10)
System.out.println("The object is the instance of this class.");
}
}
The following output appears after executing the Java file:
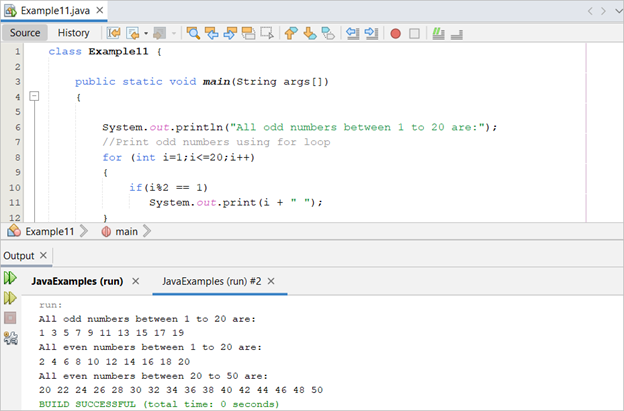
Loops
The uses of “for”, “while”, and “do-while” loops are shown in the following example. The loops are used here to print the odd and even numbers:
public static void main(String args[])
{
System.out.println("All odd numbers between 1 to 20 are:");
//Print odd numbers using for loop
for (int i=1;i<=20;i++)
{
if(i%2 == 1)
System.out.print(i + " ");
}
System.out.println();
System.out.println("All even numbers between 1 to 20 are:");
int i=1;
//Print even numbers using a while loop
while (i<=20)
{
if(i%2 == 0)
System.out.print(i + " ");
i++;
}
System.out.println();
System.out.println("All even numbers between 20 to 50 are:");
int j=20;
//Print odd numbers using a do-while loop
do
{
System.out.print(j + " ");
j = j + 2;
}while(j<=50);
System.out.println();
}
}
The following output appears after executing the Java file:
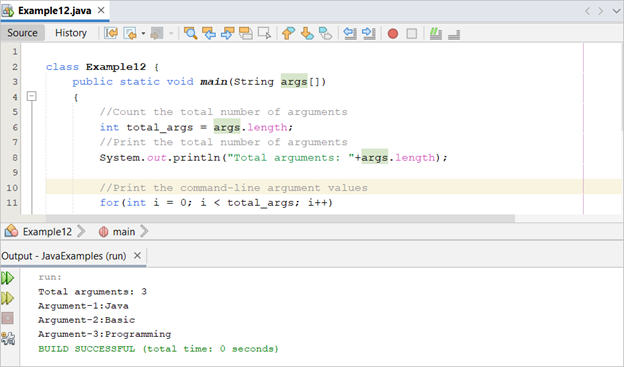
Command-Line Arguments
The method of using the command-line arguments in Java is shown in the following example. The total number of arguments and the argument values are printed after executing the program:
public static void main(String args[])
{
//Count the total number of arguments
int total_args = args.length;
//Print the total number of arguments
System.out.println("Total arguments: "+args.length);
//Print the command-line argument values
for(int i = 0; i < total_args; i++)
{
int num = i + 1;
System.out.println("Argument-" + num + ":" + args[i]);
}
}
}
You can provide the argument values from the command prompt or using the project properties window of the NetBeans. All examples of the tutorial are created and executed using NetBeans. So, the method of setting the argument values in NetBeans is shown here.
The following window appears if you right-click on the Java project and click on the “properties” menu item. Select “Run”. Then, set the Java class name and the argument values in the “Arguments” field. Here, “Java Basic Programming” is set in the arguments field:
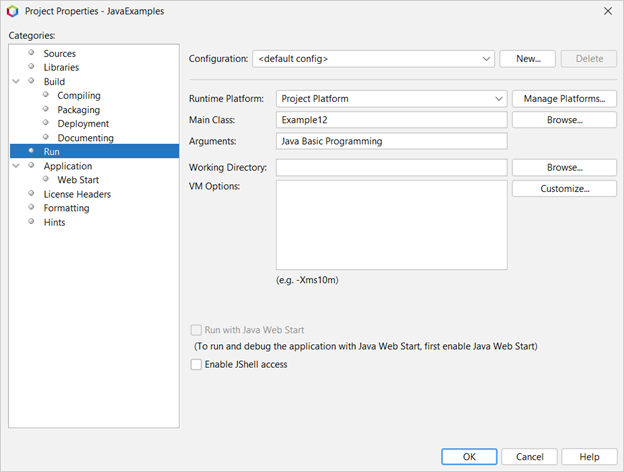
You have to select “Run Main Project” from the “Run” menu to check the output. The following output appears after executing the Java file:
Constructor
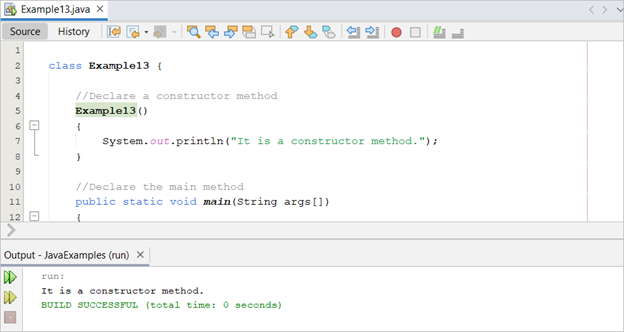
Constructor is a very useful method of object-oriented programming that is called automatically at the time of object creation. The name of the constructor method is the same as the class name in Java. A simple use of the constructor method is shown in the following example:
//Declare a constructor method
Example13()
{
System.out.println("It is a constructor method.");
}
//Declare the main method
public static void main(String args[])
{
//Create an object of the class
Example13 obj = new Example13();
}
}
The following output appears after executing the Java file:
Exception Handling
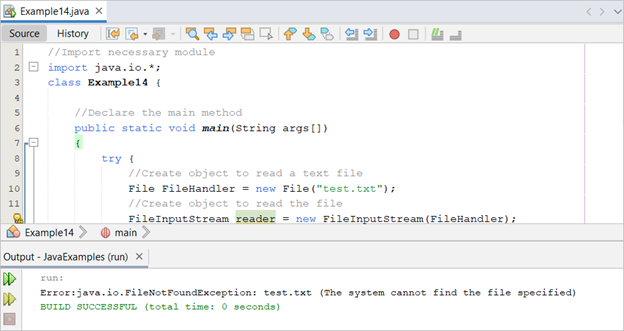
Exception handling is a very useful feature of any programming language. If any error occurs during the execution of the code, that error can be handled more efficiently using the exception handling. The “try-catch” block is used in Java to handle the exceptions. The method of using the “try-catch” block is shown in the following example. The following code checks whether a file exists in the current location or not. An exception is thrown if the file does not exist:
import java.io.*;
class Example14 {
//Declare the main method
public static void main(String args[])
{
try {
//Create an object to read a text file
File FileHandler = new File("test.txt");
//Create an object to read the file
FileInputStream reader = new FileInputStream(FileHandler);
}
catch (IOException e)
{
//Print the error message
System.out.println("Error:" + e);
}
}
}
The following output appears after executing the Java file if the “test.txt” file does not exist in the current location:
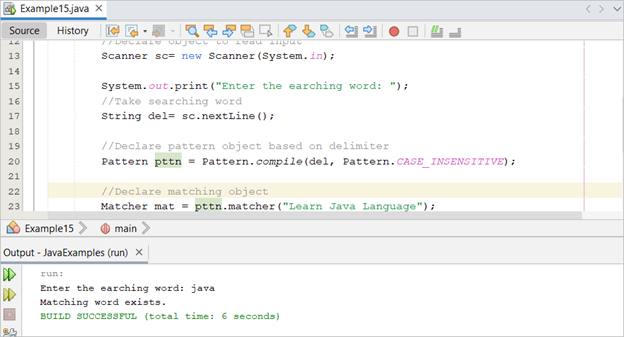
Searching with Regular Expression
The method of searching a string in a text using the Java regex is shown in the following example. The “Pattern” and “Matcher” modules are used in the code to do the task:
import java.util.regex.Pattern;
import java.util.regex.Matcher;
import java.util.*;
class Example15 {
//Declare the main method
public static void main(String args[])
{
//Declare object to read input
Scanner sc= new Scanner(System.in);
System.out.print("Enter the earching word: ");
//Take the searching word
String del= sc.nextLine();
//Declare pattern object based on delimiter
Pattern pttn = Pattern.compile(del, Pattern.CASE_INSENSITIVE);
//Declare matching object
Matcher mat = pttn.matcher("Learn Java Language");
//Searching the input value
if(mat.find())
System.out.println("Matching word exists.");
else
System.out.println("Matching word does not exists.");
}
}
The following output appears after executing the Java file if the word “Java” is taken as the input:
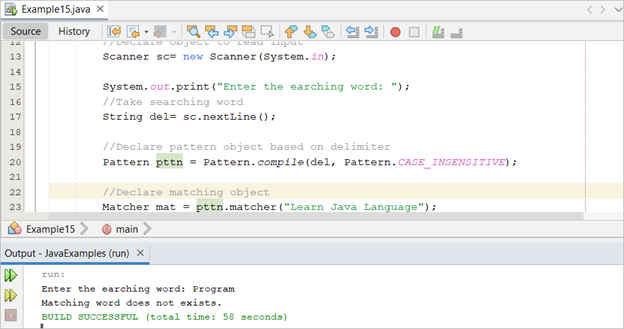
The following output appears after executing the Java file if the word “Program” is taken as the input:
Reading and Writing Files
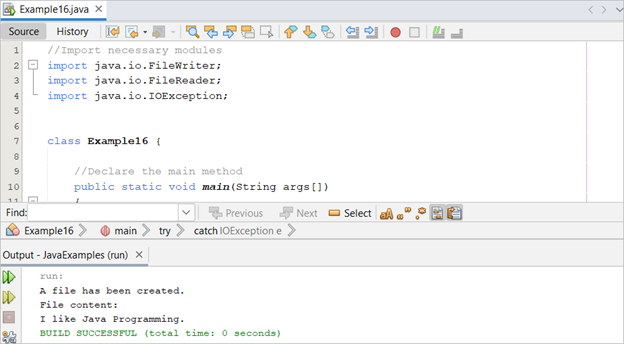
Java has many options to write the data into the file and read the data from the file. The method of writing and reading the text files using the “FileWriter” and “FileReader” is shown in the following example. The data is written into a text file using the first try-catch block and the content of the file is read using the second try-catch block:
import java.io.FileWriter;
import java.io.FileReader;
import java.io.IOException;
class Example16 {
//Declare the main method
public static void main(String args[])
{
String filename = "sample.txt";
//Write to a text file
try {
FileWriter writer = new FileWriter(filename);
writer.write("I like Java Programming.");
writer.close();
System.out.println("A file has been created.");
}
catch (IOException e)
{
System.out.println(e);
}
//Read from an existing text file
try {
FileReader reader = new FileReader(filename);
int c;
System.out.println("File content:");
while ((c = reader.read()) != -1) {
System.out.print((char) c);
}
reader.close();
System.out.println();
} catch (IOException e) {
System.out.println(e);
}
}
}
The following output appears after executing the Java file:
Date and Time
The method of retrieving the current date and time values is shown in the following example:
import java.util.*;
import java.text.*;
class Example17 {
//Declare the main method
public static void main(String args[])
{
//Create object to read current date and time
Date today = new Date( );
//Create object to format the date and time value
SimpleDateFormat format = new SimpleDateFormat ("dd-MM-yyyy hh:mm:ss a");
//Print the current date and time
System.out.println("Current Date and Time: " + format.format(today));
}
}
The following output appears after executing the Java file:

Nested Classes
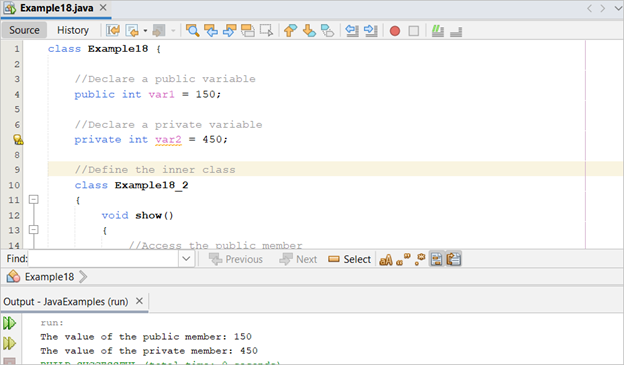
When a class is declared inside another class, it is called a “nested class”. The methods of declaring the nested class and accessing the method of the nested class are shown in the following example. Here, the data members of the main class are printed using the method of the nested class:
//Declare a public variable
public int var1 = 150;
//Declare a private variable
private int var2 = 450;
//Define the inner class
class Example18_2
{
void show()
{
//Access the public member
System.out.println("The value of the public member: " + var1);
//Access the private member
System.out.println("The value of the private member: " + var2);
}
}
public static void main(String[] args)
{
//Create an object of the inner class
Example18 outObj = new Example18();
//Create an object of the outer class
Example18.Example18_2 inObj = outObj.new Example18_2();
//Call the method of the inner class
inObj.show();
}
}
The following output appears after executing the Java file:
Inheritance
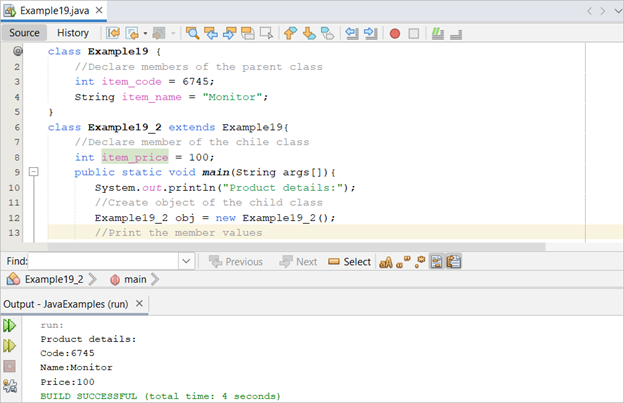
When a new class is created by inheriting the features of another class, it is called “inheritance”. The new class is called the “child class” and the old class is called the “parent class”. The method of creating a child class from a parent class is shown in the following example:
//Declare members of the parent class
int item_code = 6745;
String item_name = "Monitor";
}
class Example19_2 extends Example19{
//Declare member of the chile class
int item_price = 100;
public static void main(String args[]){
System.out.println("Product details:");
//Create an object of the child class
Example19_2 obj = new Example19_2();
//Print the member values
System.out.println("Code:" + obj.item_code);
System.out.println("Name:" + obj.item_name);
System.out.println("Price:" + obj.item_price);
}
}
The following output appears after executing the Java file:
Polymorphism
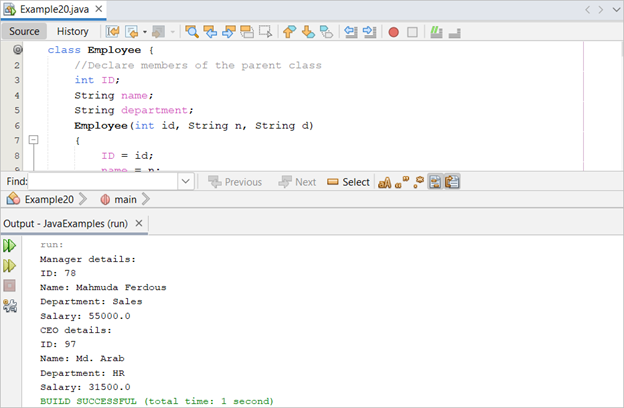
The meaning of polymorphism is “many forms”. It is a useful feature of the object-oriented programming. The method of implementing polymorphism in the inherited classes is shown in the following example. Here, the method named details() is declared in both classes but they generate different outputs:
//Declare members of the parent class
int ID;
String name;
String department;
Employee(int id, String n, String d)
{
ID = id;
name = n;
department = d;
}
void basic()
{
System.out.println("ID: "+ ID);
System.out.println("Name: "+ name);
System.out.println("Department: "+ department);
}
}
class Manager extends Employee{
Manager(int id, String n, String d)
{
super(id,n,d);
}
//Detail method for Manager class
void details()
{
basic();
int basic = 50000;
float bonus = basic * 0.10f;
System.out.println("Salary: " + (basic+bonus));
}
}
class CEO extends Employee{
CEO(int id, String n, String d)
{
super(id,n,d);
}
//Detail method for CEO class
void details()
{
basic();
int basic = 30000;
float bonus = basic * 0.05f;
System.out.println("Salary: " + (basic+bonus));
}
}
class Example20{
public static void main(String args[])
{
//Create an object of the Manager class
Manager obj = new Manager(78, "Mahmuda Ferdous", "Sales");
System.out.println("Manager details:");
obj.details();
//Create an object of the CEO class
CEO obj2 = new CEO(97, "Md. Arab", "HR");
System.out.println("CEO details:");
obj2.details();
}
}
The following output appears after executing the Java file:
Encapsulation
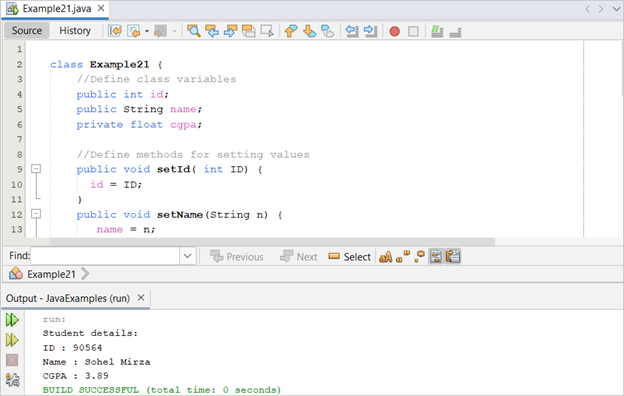
Encapsulation is another important feature of the object-oriented programming. It is mainly used to hide the data members and methods of the class and prevent a direct access to the particular component. The use of encapsulation is shown in the following example:
//Define class variables
public int id;
public String name;
private float cgpa;
//Define methods for setting values
public void setId( int ID) {
id = ID;
}
public void setName(String n) {
name = n;
}
public void setCGPA( float result) {
cgpa = result;
}
//Define methods for getting values
public int getId() {
return id;
}
public String getName() {
return name;
}
public float getCGPA() {
return cgpa;
}
public static void main(String args[])
{
Example21 obj = new Example21();
obj.setId(90564);
obj.setName("Sohel Mirza");
obj.setCGPA(3.89f);
System.out.println("Student details:");
System.out.println("ID : " + obj.getId() + "\nName : " + obj.getName() + "\nCGPA : " + obj.getCGPA());
}
}
The following output appears after executing the Java file:
Abstraction
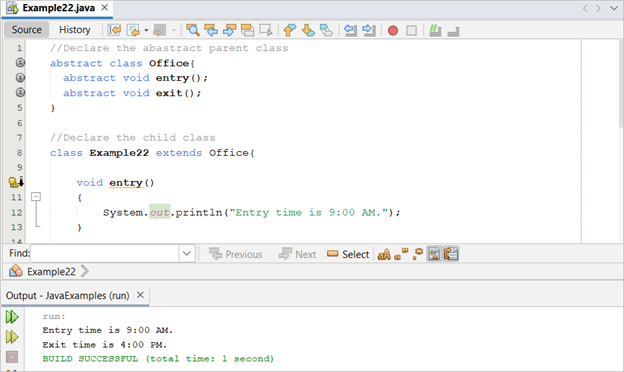
The method that is declared in the abstract class is implemented in the child class. A simple use of abstract class is shown in the following example. Two methods of the abstract class are implemented in the child class in the code:
abstract class Office{
abstract void entry();
abstract void exit();
}
//Declare the child class
class Example22 extends Office{
void entry()
{
System.out.println("Entry time is 9:00 AM.");
}
void exit()
{
System.out.println("Exit time is 4:00 PM.");
}
public static void main(String args[])
{
//Create an object of the class
Example22 obj = new Example22();
obj.entry();
obj.exit();
}
}
The following output appears after executing the Java file:
Interfaces
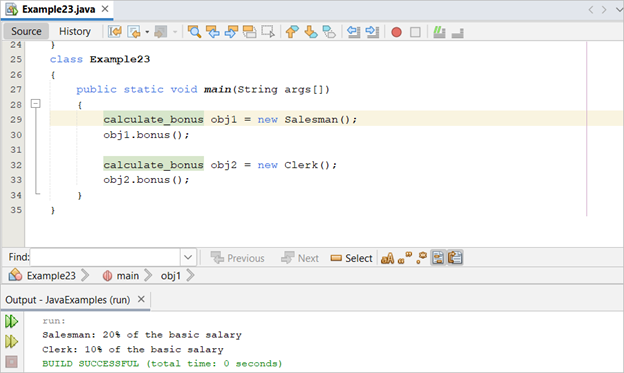
The interface is another feature of the object-oriented programming like the abstract class. But there are some differences between the abstract class and the interface which are not discussed in this tutorial. Java does not support multiple inheritances. Interfaces are used in Java to solve this issue. The use of an interface is shown in the following example. The method that is declared in the interface is implemented in two classes in the code:
interface calculate_bonus{
void bonus();
}
//Declare the class that implements the interface
class Salesman implements calculate_bonus{
public void bonus()
{
System.out.println("Salesman: 20% of the basic salary");
}
}
//Declare another class that implements the interface
class Clerk implements calculate_bonus{
public void bonus()
{
System.out.println("Clerk: 10% of the basic salary");
}
}
class Example23
{
public static void main(String args[])
{
calculate_bonus obj1 = new Salesman();
obj1.bonus();
calculate_bonus obj2 = new Clerk();
obj2.bonus();
}
}
The following output appears after executing the Java file:
Operator Overloading
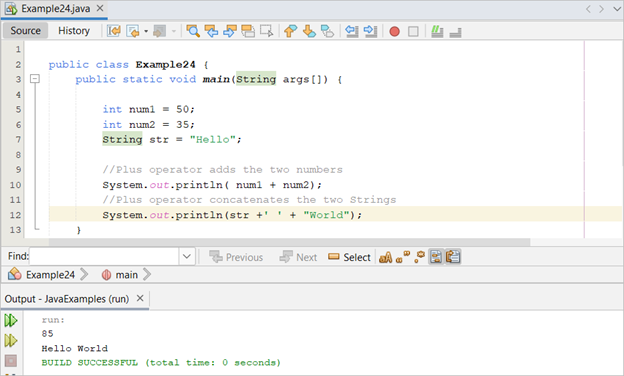
When any operator is used for a different purpose, it is called “operator overloading”. Java does not support operator overloading except the plus(+) operator. Generally, the plus(+) operator is used in Java to concatenate the string values. But another use of this operator is to add the numeric values. This operator overloading is shown in the following example:
public static void main(String args[]) {
int num1 = 50;
int num2 = 35;
String str = "Hello";
//Plus operator adds the two numbers
System.out.println( num1 + num2);
//Plus operator concatenates the two Strings
System.out.println(str +' ' + "World");
}
}
The following output appears after executing the Java file:
Method Overloading
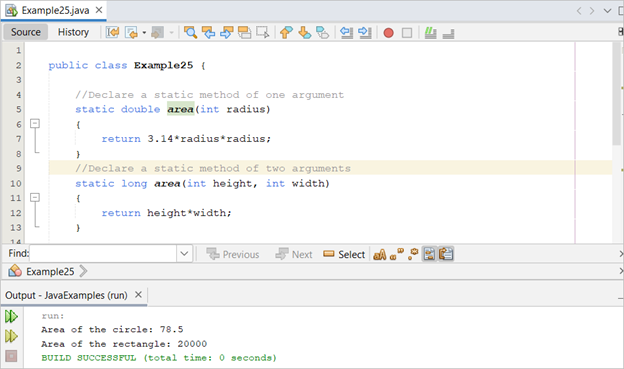
When two or more methods of the same name with different arguments are declared in a class, it is called “method overloading”. The use of method overloading is shown in the following example. Here, one area() method is declared with one argument that calculates the area of a circle. Another area() method is declared with two arguments that calculates the area of a rectangle:
//Declare a static method of one argument
static double area(int radius)
{
return 3.14*radius*radius;
}
//Declare a static method of two arguments
static long area(int height, int width)
{
return height*width;
}
public static void main(String args[]) {
System.out.println("Area of the circle: " + Example25.area(5));
System.out.println("Area of the rectangle: " + Example25.area(100,200));
}
}
The following output appears after executing the Java file:
Method Overriding
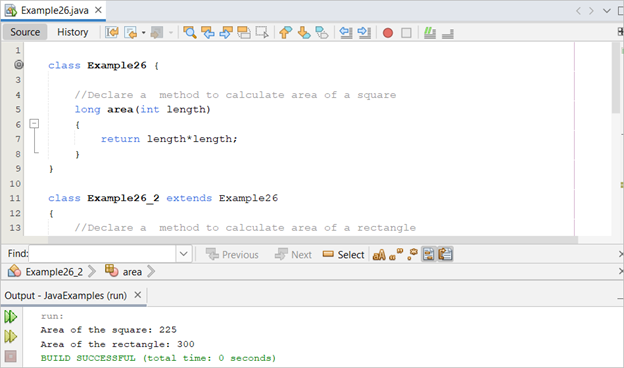
When the same method is declared in the parent class and the child class but with different arguments, this feature is called “method overriding”. The method of the parent class is accessed if the parent class object is created. The method of the child class is accessed if the child class object is created. The method of implementing the method overriding feature in Java is shown in the following example. Here, the area() method is declared in both parent and child classes. The area() method of the parent class calculates the area of a square and the area() method of the child class calculates the area of a rectangle:
//Declare a method to calculate the area of a square
long area(int length)
{
return length*length;
}
}
class Example26_2 extends Example26
{
//Declare a method to calculate the area of a rectangle
long area(int height, int width)
{
return height*width;
}
public static void main(String args[]) {
//Create an object of the parent class
Example26 obj1 = new Example26();
System.out.println("Area of the square: " + obj1.area(15));
//Create an object of the child class
Example26_2 obj2 = new Example26_2();
System.out.println("Area of the rectangle: " + obj2.area(15,20));
}
}
The following output appears after executing the Java file:
Object Cloning
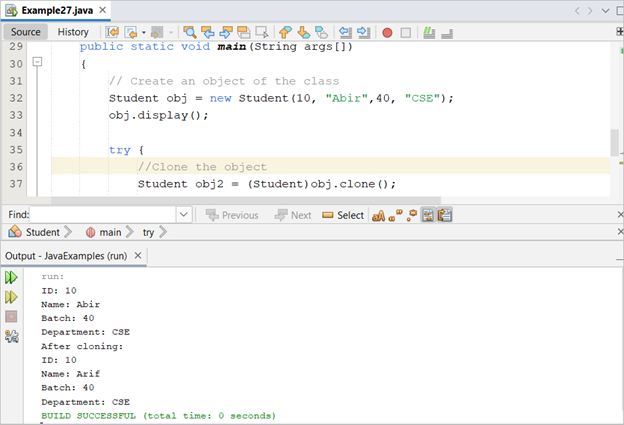
When the object variable is assigned to another variable, the reference of the variable is created. If the property of the one object variable changes, the property of another object is changed with the same value. Object cloning is used to create a copy of the object variable. In this case, the property values of each object variable can be changed separately. This feature can be implemented in Java by creating a method of cloning that is shown in the following example. Two objects are created here. The second object is created by cloning the first object:
int id, batch;
String name, dept;
//Create a constructor
Student(int i, String n, int b, String d) {
id = i;
name = n;
batch = b;
dept = d;
}
void display() {
System.out.println("ID: " + id);
System.out.println("Name: " + name);
System.out.println("Batch: " + batch);
System.out.println("Department: " + dept);
}
@Override
//Create a method for Cloning
public Object clone() throws CloneNotSupportedException
{
return super.clone();
}
//Declare the main method
public static void main(String args[])
{
// Create an object of the class
Student obj = new Student(10, "Abir",40, "CSE");
obj.display();
try {
//Clone the object
Student obj2 = (Student)obj.clone();
obj2.name = "Arif";
System.out.println("After cloning:");
obj2.display();
} catch (CloneNotSupportedException e) {
System.out.println(e);
}
}
}
The following output appears after executing the Java file:
Random Number
The random numbers are required to be generated for different programming purposes. The “Math” class is used to generate the random number. The method of generating five random numbers using the random() function and a for loop is shown in the following example. A large fractional number is generated as the random number:
public static void main(String args[])
{
//Generate 5 random numbers
for(int i=1; i <= 5; i++)
{
System.out.println("Random Number-"+ i + ": " + Math.random());
}
}
}
The following output appears after executing the Java file:

Java Package
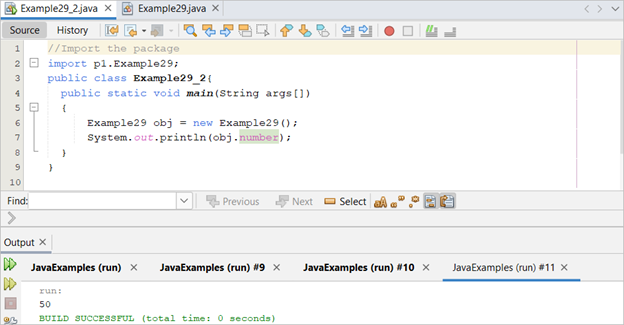
The code of one Java file can be shared in another Java file using the package name. The use of packages in Java is shown in the following example. The “p1” is set as the package name for the “Example29.java” file:
package p1;
public class Example29{
public int number = 50;
}
The “p1” package is imported in the “example29_2.java” file. So, the data member of “example29.java” can be accessed from the “example29_2.java” file.
import p1.Example29;
public class Example29_2{
public static void main(String args[])
{
Example29 obj = new Example29();
System.out.println(obj.number);
}
}
The following output appears after executing the Java file:
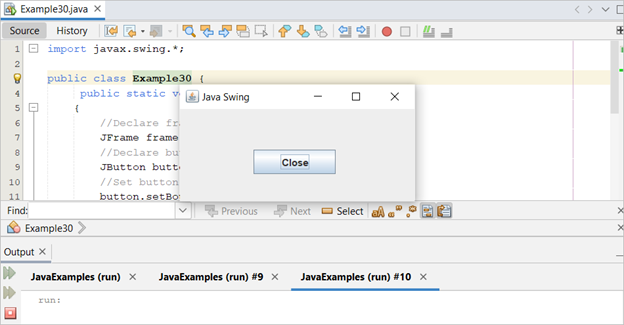
Java Swing
Java swing is used to develop the desktop applications using swing controls. A simple use of swing control is shown in the following example. A frame and a button are used in the code to create a simple Java swing application:
public class Example30 {
public static void main(String[] args)
{
//Declare frame object
JFrame frame = new JFrame();
//Declare button object
JButton button = new JButton("Close");
//Set button position
button.setBounds(90, 50, 100, 30);
//Add button to the frame
frame.add(button);
frame.setTitle("Java Swing");
frame.setSize(300, 150);
frame.setLayout(null);
frame.setVisible(true);
}
}
The following output appears after executing the Java file:
Conclusion
Java is a very popular and demanding language to develop a software of different platforms. The new Java users will be able to write a program in Java after practicing the examples of this tutorial.
Source: linuxhint.com