10 Useful Networking Commands for Raspberry Pi Linux
10 Useful Networking Commands for Raspberry Pi Linux
The list of useful networking commands is given below:
Let’s discuss the syntax and working of each command.
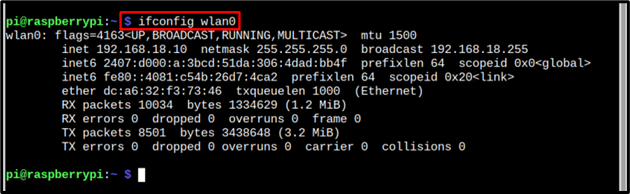
Command 1: ifconfig
The number one command on our networking command list is ifconfig command which is used to provide network information about the local machine. It is used to view the IP addresses of the network interfaces.
To view the ethernet information use the below-written command:

And to view the details of the WiFi interface, the below-written command is used:
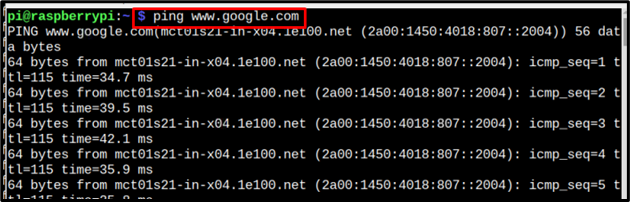
Command 2: ping
Packet Internet Groper also known as PING is a command which provides information about network connectivity between host and server. It communicates by sending packets and verifies the connectivity by receiving the packets back.
Ping can be used to verify network connectivity by using the below-mentioned command:

It can also be used to Ping a host; such as google, firefox, and others.
Syntax
Example
Command 3: hostname
The host’s information can be displayed by using the hostname command. To display the name of the host below-mentioned command can be used:
The hostname will be displayed as a result of the above command:

To display the IP address to which the host is connected below-mentioned command is used:

Command 4: dhclient
The dhclient command is used to renew and release IP addresses from a DHCP server. To renew the IP address use the below-written command:

To release the network below-mentioned command is used:

To release a particular IP interface, use the below-mentioned command targeting a particular interface:
Syntax
Example

Command 5: arp
To display the address resolution cache below-mentioned command arp command is used:
As a result of above command the IP addresses and interface information will be displayed:

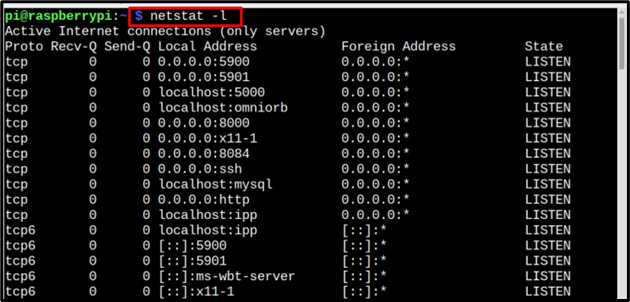
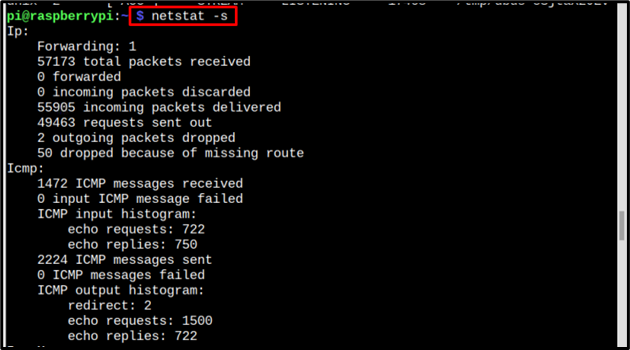
Command 6: netstat
Netstat is a very useful networking command that is used to find information about network ports and connections.
To display the list of active listening TCP ports and connections, use the below-mentioned command:
And to display statistics by protocol use the below-mentioned command:
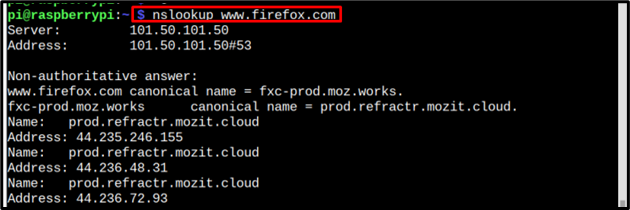
Command 7: nslookup
The nslookp is an original DNS troubleshooting tool, to use the nslookup command below-mentioned syntax can be followed:
Syntax
Example
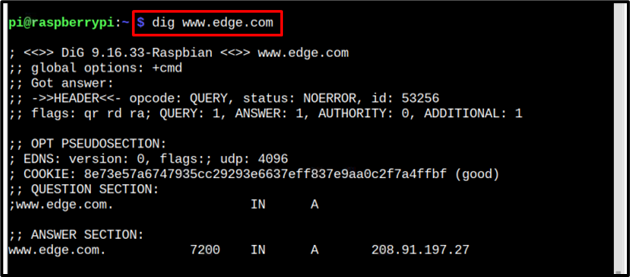
Command 8: dig
Just like nslookup, dig is also a DNS troubleshooting tool except for the fact that it is a more modern tool. To use the dig command follow the below syntax:
Syntax
Example
Command 9: route
The route command is used to edit IP or kernel routing tables. The below-mentioned command is used to configure and display the routine information:
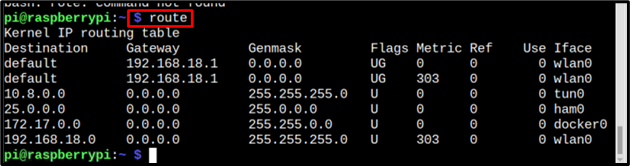
It outputs the routing table entries.
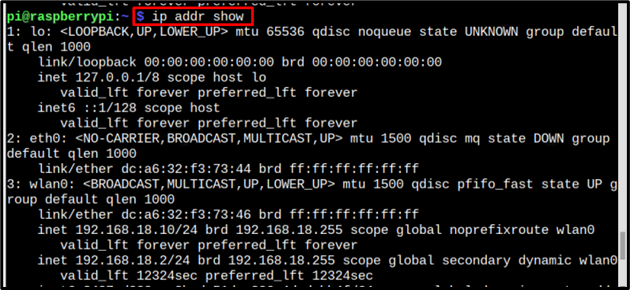
Command 10: ip
The ip command can be used to display all the devices on the IP, follow the below-mentioned command:
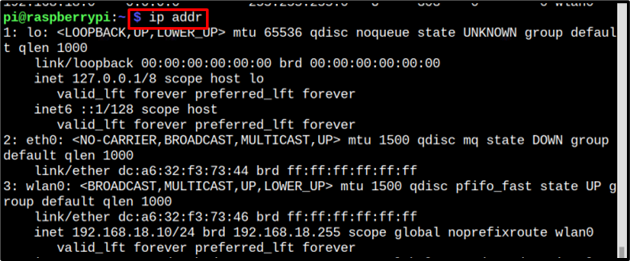
Use the below-mentioned command to display all the IP addresses and their associated network interfaces:
Conclusion
Some useful network commands for Raspberry Pi systems are discussed in the article. The commands that are discussed have the purpose to monitor the network, configuring the IP, displaying the connected devices, and many more. The basic purpose of networking commands is to display network security information and all the commands shared in the article are serving this purpose.
Source: linuxhint.com