10 Things You Probably Didn’t Know You Could do With Nano Editor

There are numerous terminal based text editors available on Linux. Vim has a special fan following for its extensive expendability. It can be used as a full-blown code editor, after all.
Nano is often considered a beginner's tool but it is also a feature-rich editor. Most users are not even aware of its full capability.
In this tutorial, I am going to list a few lesser known features that may help you get an even better editing experience with Nano.
Sounds interesting? Here, we go.
1. Using mouse inside nano
Like most editors in the command line, the mouse has no particular role in Nano too.
But that doesn't mean you cannot use mouse at all in Nano. A little bit of mouse support would come handy at times, specially for beginners.
To enable basic mouse functions in nano, use:
nano -m <filename>
It will let you :
- Place the cursor on a position by left-clicking on that position.
- Mark text by holding Shift and drag with left click.
0:00
Nano editor without and with mouse support enabled
2. Displaying a scrollbar
Actually, this is not a usual scrollbar where you can click and drag to scroll. This is more like a viewport. Setting this viewport/scrollbar on the right-hand side of the editor will help you identify at which part of the document you are currently scrolling through.
Enable the scrollbar in Nano by opening a file with the -q option.
nano -q <filename>
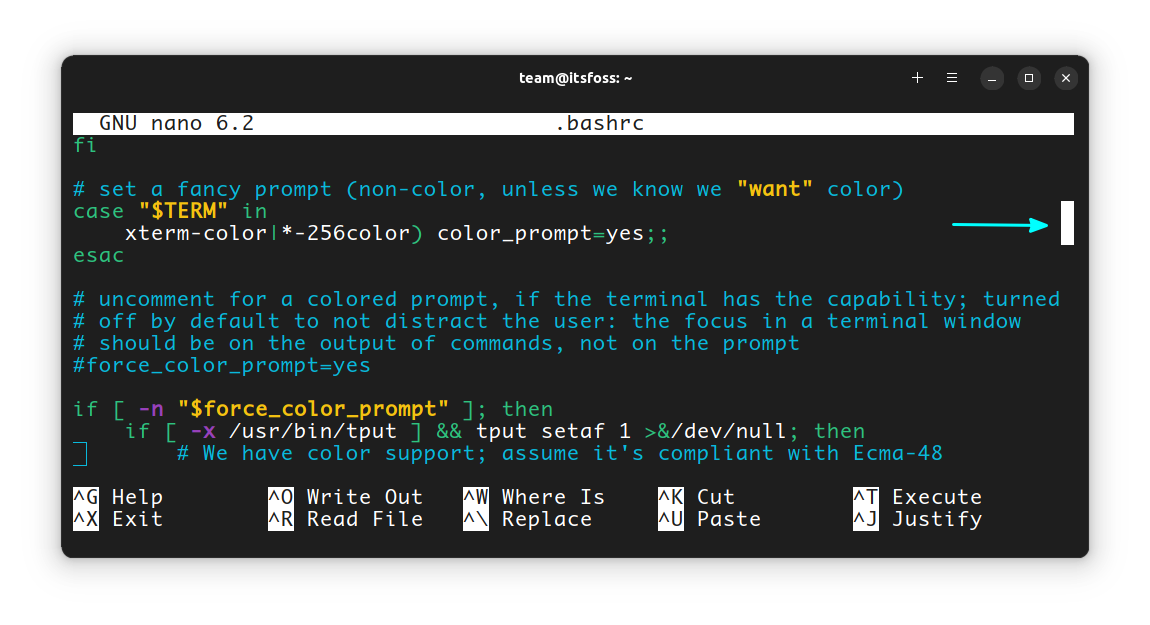
Yeah! q is not quiet mode here 😉
3. Showing line numbers
It is helpful at times to see which line you are at in the text files.
To show the line numbers, you can open a file using the l or --linenumbers option.
nano -l <filename>

If you have already opened a file and want to toggle the line numbers, you can use the key Meta + N. Meta key is usually the left Alt key on most systems.

4. Placing a minibar
Instead of placing a status bar on the bottom and a title bar on the top, you can combine both functions and place a simple minibar on the bottom.
To do that, open the file with the command:
nano --minibar <filename>

This will show:
- File name (with an asterisk, if there are any unsaved modifications).
- When first opened, it shows the number of lines in the file. This disappears if you press any key.
While you are in this view, you can press Meta + C to get some more details like, current cursor position, how deep you are in the document (in percentage, based on the line), etc.
5. Going distraction free
Nano, by default, comes with a title bar at the top, a status bar at the bottom, along with some help commands on the bottom. Some time, you may want to get a distraction-free environment. In this case, open the file using:
nano -0 <filename>
This will hide the title bar, status bar and the help section. Any important message will appear on the bottom status bar part, and will disappear in 1.5 seconds after pressing any key.

If you are within a file and want to hide parts of the editor, you can use:
- Meta + Z: Toggle Title and Status bar.
- Meta + X: Toggle the Help section at the bottom.
6. Automatically saving file at exit
To save a file in nano, you will use CTRL + O. At the same time, you can use CTRL + X and then save by pressing y, and then press enter, to actually save and exit nano.
If you find this process uneasy, nano has an autosave option!
You need to open the file, you want to autosave upon exit, using the -t option.
nano -t <filename>
Now, when editing is done, use CTRL + X to exit. It will be automatically saved, and you will not get any prompt, asking to save file, confirm exit, etc.

7. Automatically saving a backup version
Nano allows you to save a version of the file as a backup with the -B option. What this does is, save the previous, unmodified version (the version before editing) with a new file name. The new file name is the existing file name with an ~ character appended to the end.
The new backup file will be saved in the same directory as the current file.
nano -B <filename>

8. Checking spelling
To make spell check possible and efficient, you must install the hunspell package first.
To install hunspell on Ubuntu and other Debian-based systems, use the command:
sudo apt install hunspell
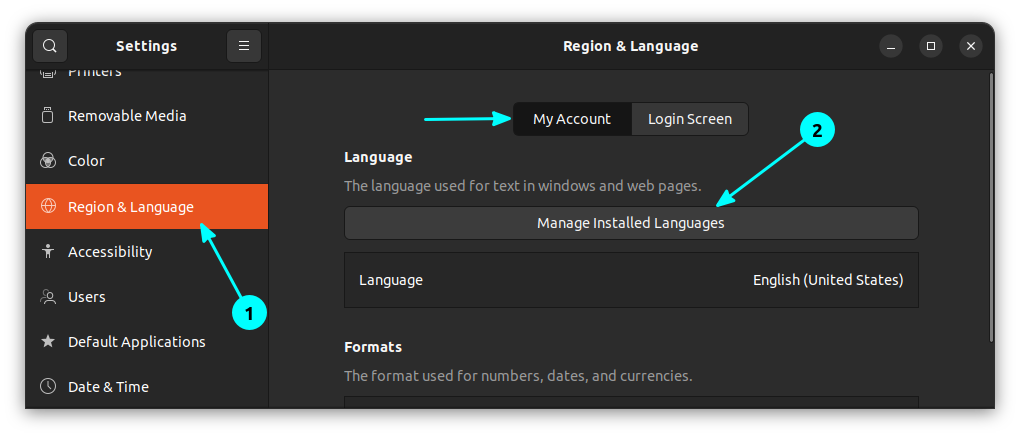
You may need to verify that the language has properly installed. For this, go to System Settings → Region and Language. Here, click on the Manage Installed Languages button.
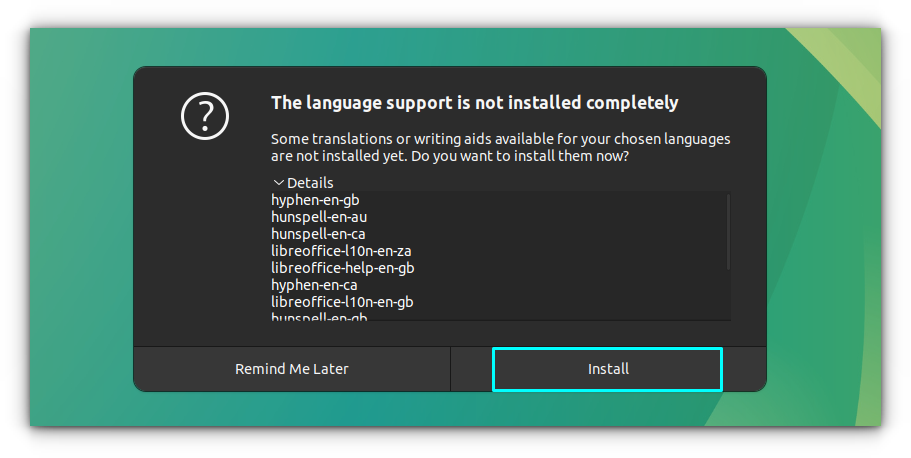
It will report if any installations needed. Install the required packages by clicking on the “Install” button.
Now, you can open a text file using the command:
nano -s hunspell <filename>
Once opened, press CTRL + T and then CTRL + S. This will start checking the spelling of the current text. You can notice that, it has started marking the wrongly spelled words. Also, it gives some suggestions for you.

You can press the number given adjacent to the suggested word to use that word in place of the wrongly spelled one. Once all the spelling errors are cleared, save the file and exit nano.
9. Placing cursor at a specified position
While opening a file in nano, you can specify where to place the cursor inside that file.
nano +c/Foo <filename>
This will open the file with the cursor at the first occurrence of the word Foo. Let's see what does the options mean.
- +: Search for the specified word from the beginning of the text. Use – instead, to start searching for the word from the end of the file.
- c: Small letter c indicates a case-sensitive search.

10. Opening file in read-only mode
Nano also supports a view-only mode, where, you cannot enter any characters. You can only view the file.
I know that most people use commands like less for this purpose, but if you are someone who uses one tool for multiple purposes, this will be a good addition.
To open a file in view mode, use:
nano -v <filename>

This will prevent any accidental change to the document.
Learned something new?
These are some of the unusual and less known features Nano offers. I hope you learned some new Nano tricks. If you find your new favorite Nano tweak, which one is it? Also, do you know any more such cool Nano features? Share with us in the comments.
Source: It's FOSS